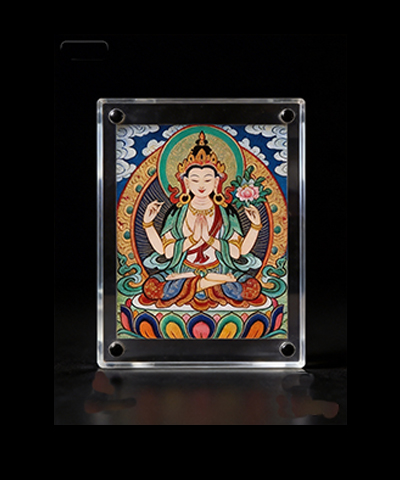
From Sketch to Painting: How a Traditional Thangka Takes Shape

Starting with a Blank Canvas
When we look at a finished traditional Thangka, what often catches our attention first is its rich color, intricate linework, gold detailing, and carefully ordered composition. There is so much to see that the eye can almost feel overwhelmed.
But before any of these details appear, there is simply a blank canvas.
In Chinese painting, there is an old expression: hui shi hou su (绘事后素). It is often understood as a reminder that the painted image begins with a prepared foundation. Before color and decoration can take their place, the underlying structure must be established.
In Thangka painting, composition and drawing are essential parts of that foundation. They are not minor preparations to rush through before the “real painting” begins. They establish the order of the entire work.
The position of a figure, the curve of a cloud, the placement of an ornament, and the spacing between elements all affect how the finished painting will look and feel.
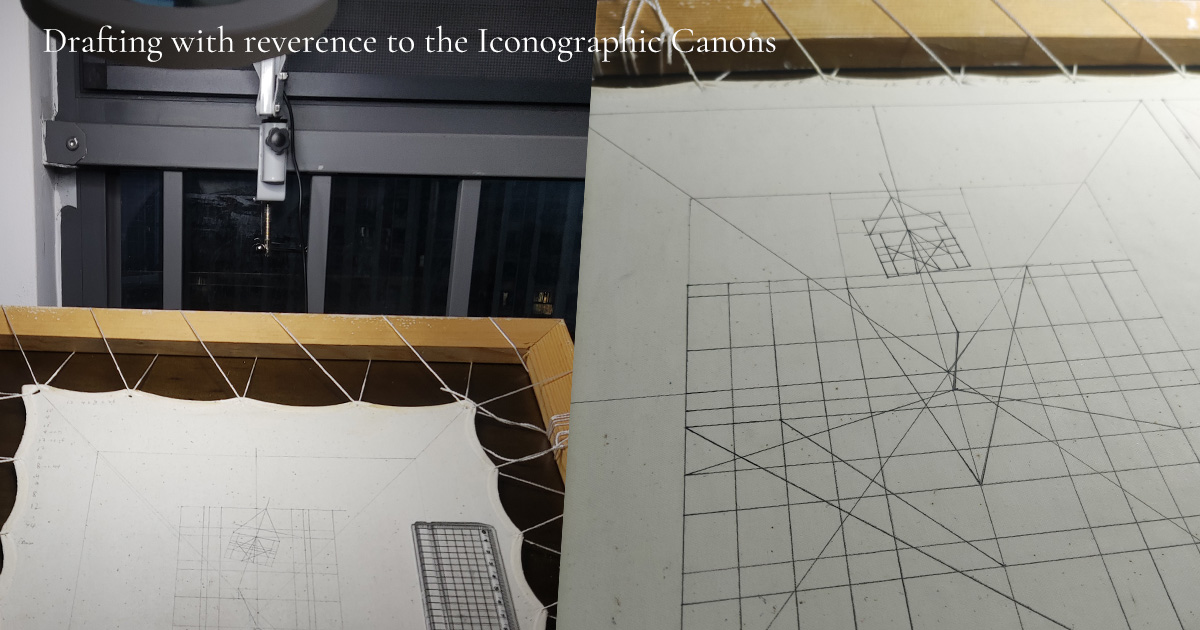
Traditional Thangka painting follows established systems of proportion and measurement, often referred to as iconometry. These principles have been passed down through generations of artists and are central to the way traditional Buddhist figures are drawn.
For me, respecting these inherited principles is an important responsibility as a practitioner working within this tradition. A traditional Thangka is not simply an elaborate image. Its visual structure is built on a body of knowledge that has been carefully preserved and transmitted.
The process from sketch to painting is therefore much more than adding details to a simple drawing. It is a disciplined process shaped by both tradition and the artist's skill.
Step 1: Composition — Planning the Whole Image
Before beginning the drawing, I need to think about the composition as a whole.
Where should the central figure sit? How much space should it occupy? How will the surrounding decoration unfold? Which areas need intricate details, and where should the composition remain relatively open?
These questions may sound simple, but they determine the visual balance of the finished work.
In traditional Thangka painting, the proportions and poses of Buddhist figures follow established iconometric principles. The relationships between the head, torso, limbs, hands, and other features must be carefully considered. The surrounding decorative elements also need to support the main figure rather than merely fill the empty spaces.
Like many Thangka painters, I follow these traditional proportions carefully when drawing the figures. For me, this is not about being rigid or refusing to make artistic decisions. It is about respecting the tradition I have learned and the responsibility that comes with carrying it forward.
The background allows more room for individual interpretation. Clouds, landscapes, flowers, and decorative patterns can be adapted to suit the central figure, provided that the overall composition remains harmonious.
Once the layout has been considered, I begin drawing directly on the prepared Thangka canvas with a pencil. I lightly mark the positions of the main elements, paying attention to the margins at the top, bottom, left, and right.
How much space should each element occupy? What should appear in the background? How should the different parts relate to one another?
These decisions need to be made before the drawing becomes more detailed. Once the basic arrangement feels right, I can begin developing the sketch.
Step 2: Drawing and Outlining — Bringing the Image into Focus
Once the composition is established, the drawing becomes more precise.
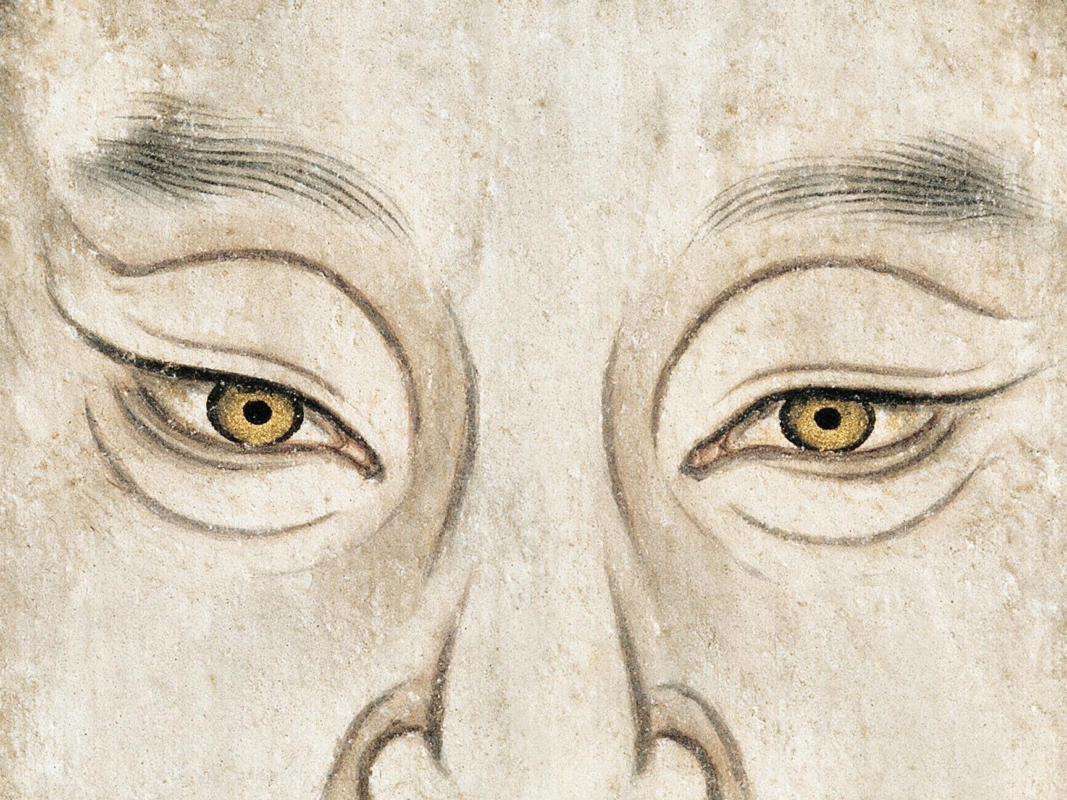
In traditional Thangka painting, lines do more than define the outer shape of an object. They establish proportions, clarify structure, and determine the relationships between individual details.
A small change in the position of a line can affect the shape of a limb, the size of an ornament, or the placement of an object. One adjustment can influence many other parts of the image. The earliest lines therefore carry more responsibility than they might appear to.
This stage requires patience and repeated observation.
The canvas I work on has been carefully prepared and polished, so I need to draw with particular care. Erasing too much can leave dark marks on the surface. I use the pencil lightly and try to avoid unnecessary corrections.
Some experienced painters may be able to draw almost flawlessly on the first attempt. I still have more practice ahead of me.
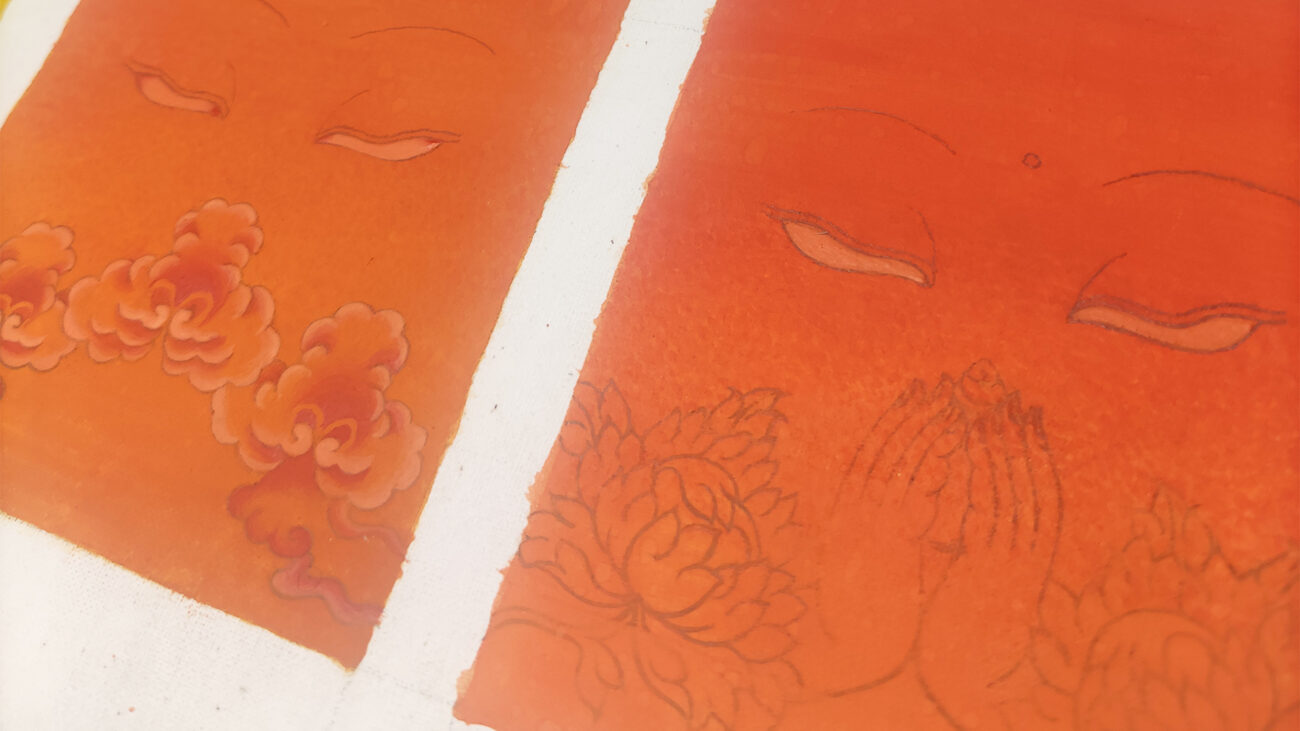
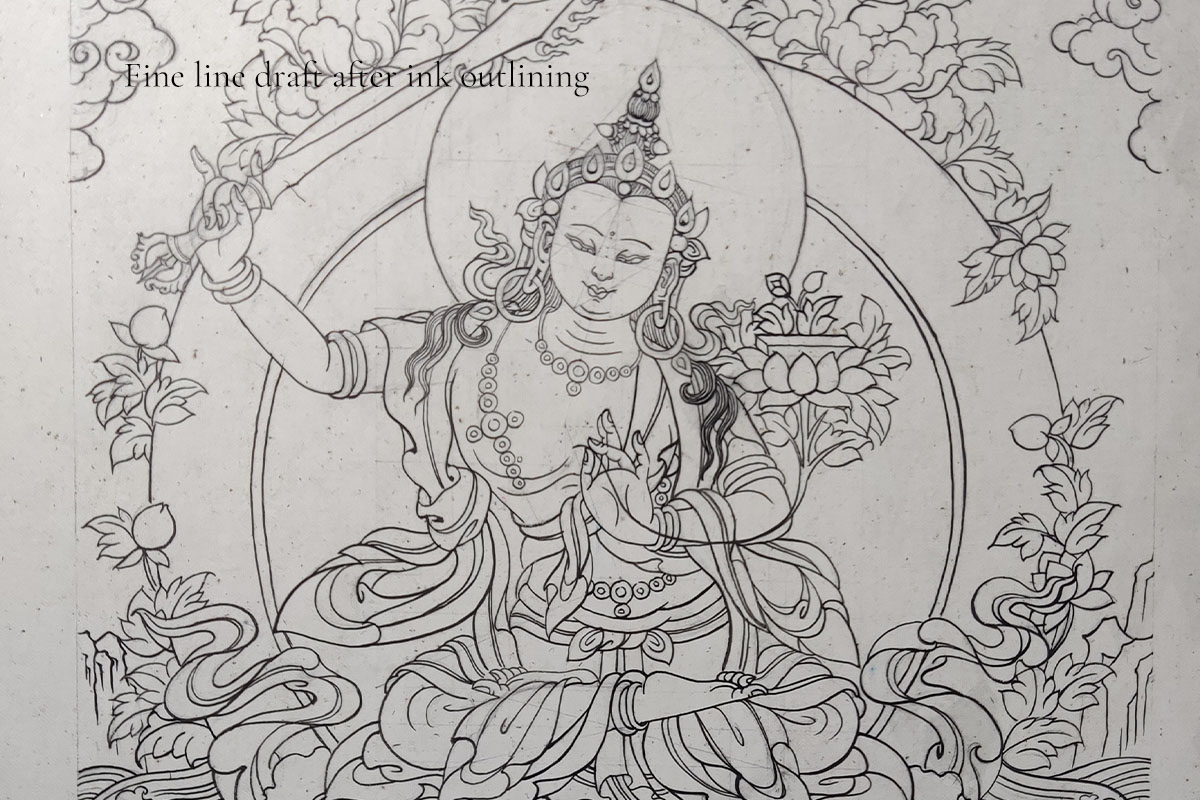
After completing the pencil drawing, I move on to the first stage of outlining.
I use Chinese ink, much as I would when creating a baimiao drawing in traditional Chinese painting. Baimiao is a technique that relies primarily on lines to describe the form, without depending on broad areas of color or tonal shading to construct it.
The challenge is to make each line do as much work as possible. Through changes in direction, contour, and the way lines meet or overlap, the drawing can suggest which forms are in front, which are behind, and how the different parts of an object turn in space.
This is one of the qualities I appreciate in Chinese painting. Rather than relying primarily on light and shadow to describe form, it gives line an important role in expressing structure and movement.
The visual effects are different from those of Western painting, and I would not say that one approach is better than the other. They have their own languages. For me, the restraint and rhythm of Chinese linework have a particular character that I continue to value in my own practice.
Once the initial line drawing is complete, the painting is ready for color.
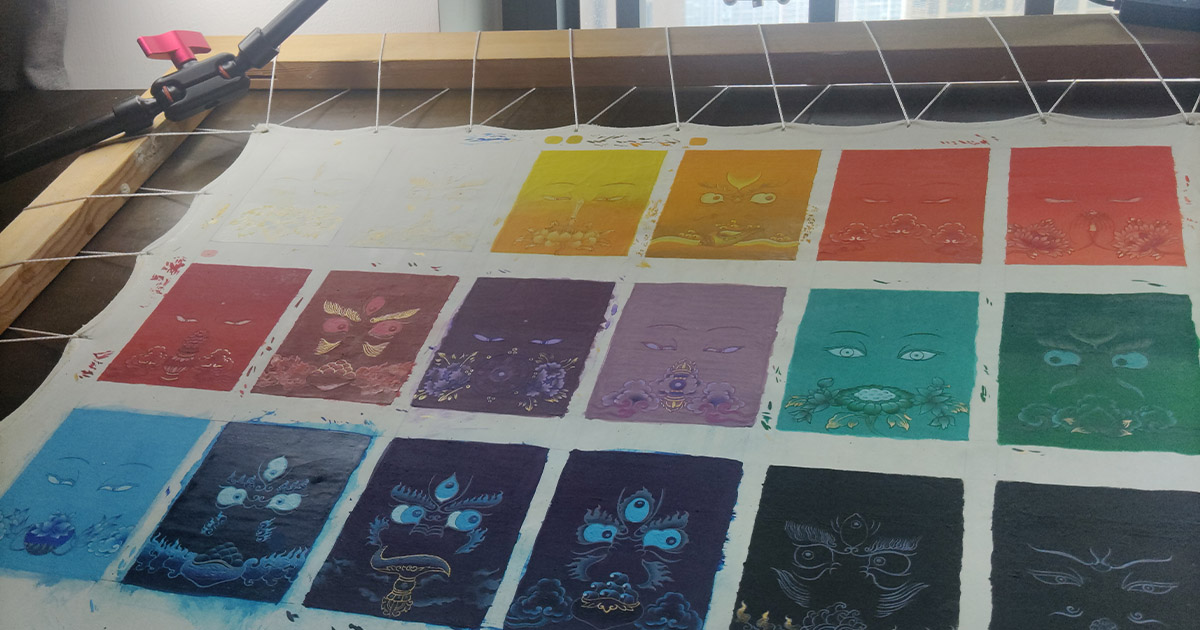
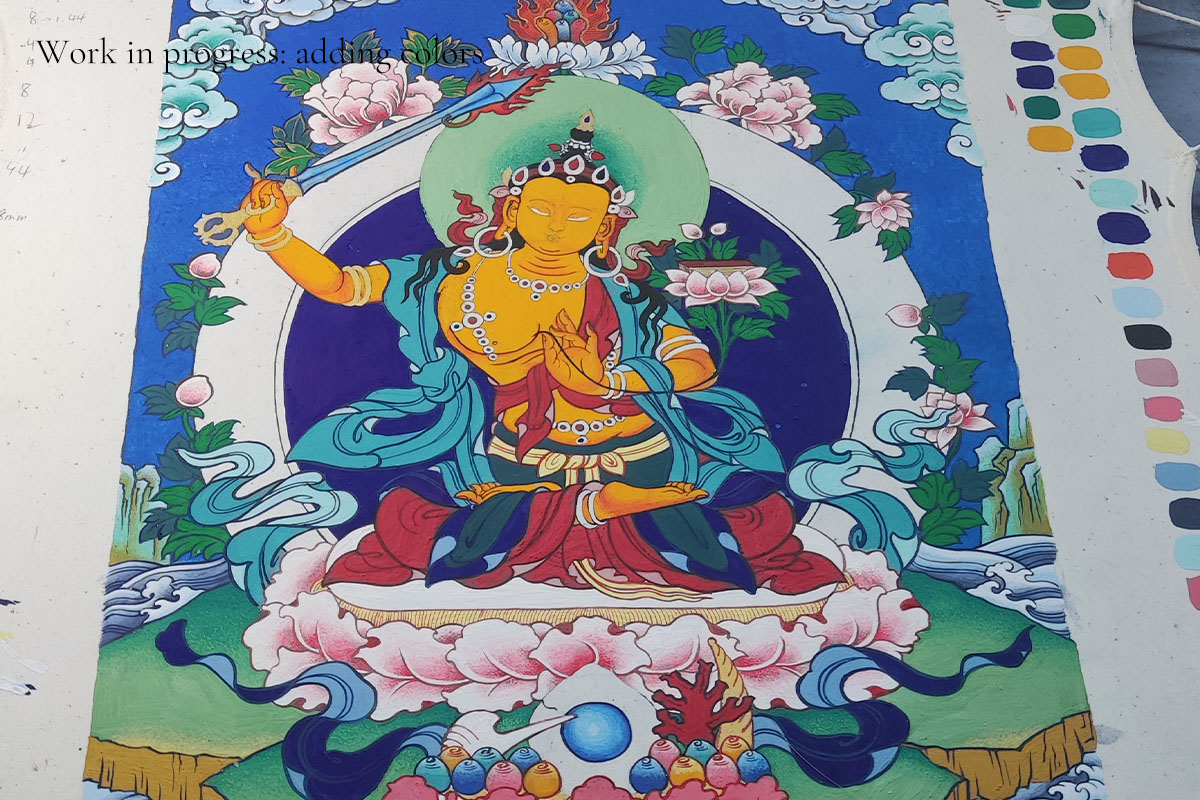
Step 3: Color — Building Relationships and Layers
Color is one of the most immediately striking qualities of Thangka art. Strong contrasts, carefully arranged hues, intricate patterns, and gold details all contribute to its distinctive visual language.
But traditional Thangka color is not simply a matter of choosing whichever colors look attractive.
In traditional Buddhist imagery, conventions govern many aspects of a figure, including its appearance, proportions, posture, clothing, and attributes. Color can also carry specific iconographic meanings. The complexion of a particular figure, for example, may be determined by the established tradition rather than by an artist's personal preference.
Within these conventions, however, there is still room for artistic judgment.
The sky may be represented by blue and grass by green, but within each color family there are many possible hues. The choice of a particular blue, the balance between a warm red and a cooler green, or the way a color sits beside gold can change the character of the whole composition.
Traditional Thangka painting developed in Tibetan cultural regions, where painters cultivated sophisticated systems of color relationships. Different traditions and workshops have their own approaches, and color knowledge has been passed down through practical training as well as established conventions.
The materials used in Thangka painting have also evolved. Traditionally, painters worked with pigments derived from minerals and other natural sources. Today, artists may also use materials from Chinese mineral-color painting and modern mineral-pigment or rock-color practices. These materials offer additional possibilities for color and texture.
As Thangka painting has been practiced by artists from different cultural backgrounds, including Tibetan, Han Chinese, Mongolian, and Manchu artists, its contemporary practice has continued to develop in different ways.
As a Manchu artist trained in Chinese painting and calligraphy as well as Thangka, I pay close attention to the relationships between colors. A color may look beautiful on its own, but it still needs to work with the rest of the image. Every individual area should contribute to the harmony of the whole.
Preparing Pigments: A Lesson in Patience
Preparing the canvas and drawing the initial lines already take time. Working with color introduces another kind of patience.
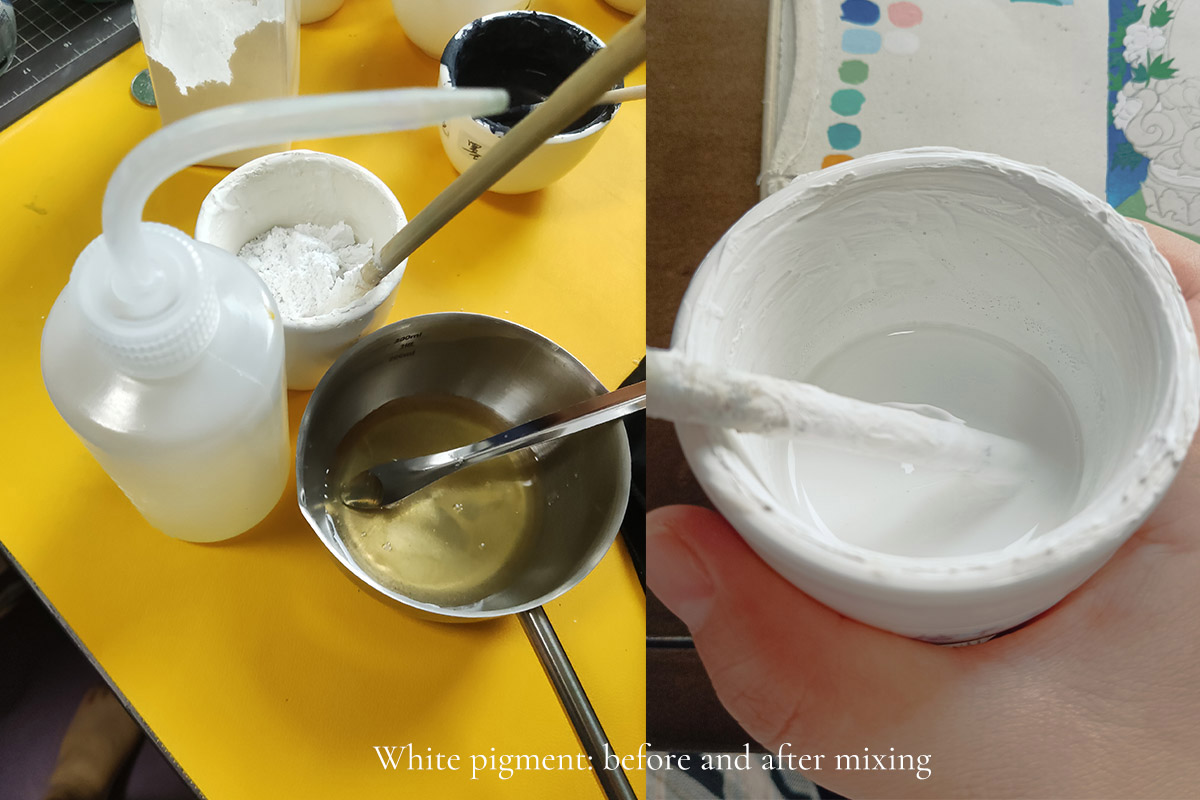
The pigments I use can dry and harden after a painting session. Before using them again, I may need to rehydrate and grind them until the texture is smooth and fine. If coarse particles remain, the paint may not sit evenly on the canvas. If a particle later comes away from the surface, it can leave a small area without color.
Grinding pigments is therefore not a step I can casually skip. A little extra effort at this stage can prevent much more troublesome corrections later.
The climate also affects this work. I now live in southern China, where the humidity is relatively high. Sometimes, when I return to my pigments the following day, they have not fully dried. Painters working in Tibet, Qinghai, Gansu, Inner Mongolia, and other drier regions may find that their pigments dry much more quickly and need to be prepared again more frequently.
When I was a beginner, I tried to find a shortcut. I wanted to keep my pigments moist so that I could avoid grinding them again. I sprayed them with water day after day, hoping to save time.
It did not work.
The excess water weakened the binding quality of the paint. Once applied to the canvas and dried, the color became powdery and began to fall away.
I asked my teachers whether they had a secret for keeping their pigments from drying out.
They told me that they simply let them dry.
I asked why. They explained that if the pigments remained wet for too long, mold could develop, potentially ruining the entire batch.
After that, I stopped looking for shortcuts and returned to grinding my pigments properly.
It was a small lesson, but one I remember. In this kind of work, trying to save time at the wrong stage can create much more work later.
Applying Color Carefully
Preparing the pigments is only part of the process. Applying them requires equal care.
I pay attention to how one area of color meets the next, how light or dark each section should be, and whether the transitions feel even. Rushed or uneven application can leave visible bands and patches that interrupt the overall surface.
Different areas call for different techniques. Some colors need to be applied evenly in flat areas; others benefit from stippling or gradual shading. The technique depends on the form being painted and the effect required.
Once the color has been laid in and the main relationships are established, the work moves toward the next stage: bringing the lines and details back into focus.
Subtitle text example
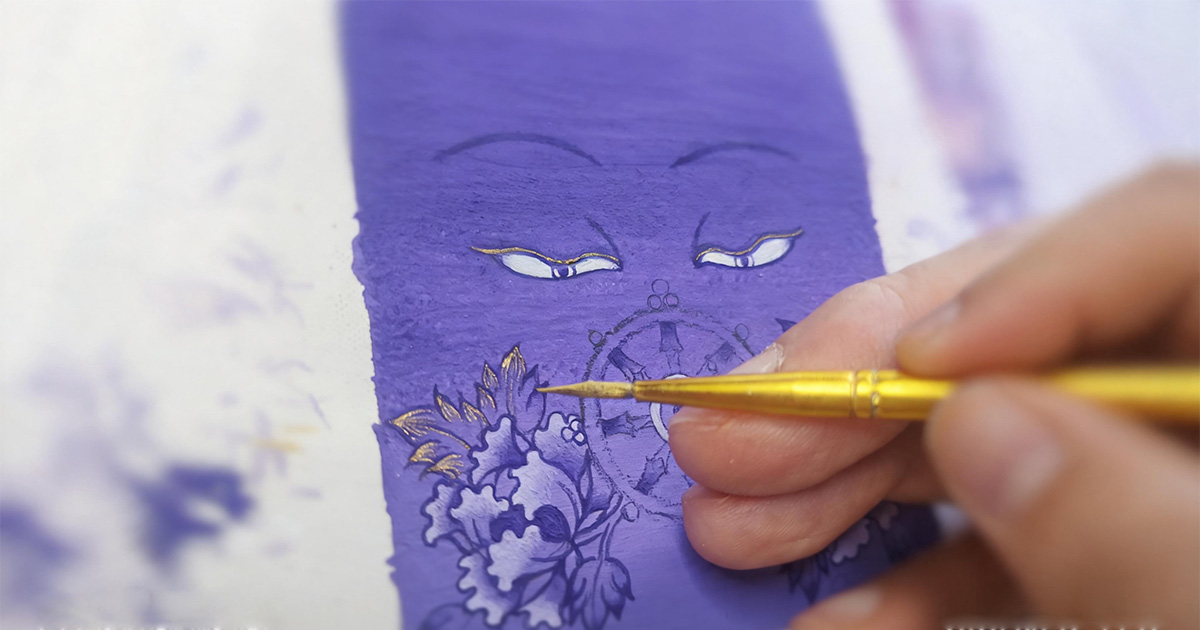
Step 4: Final Outlining and Gold Detailing — Bringing Everything Together
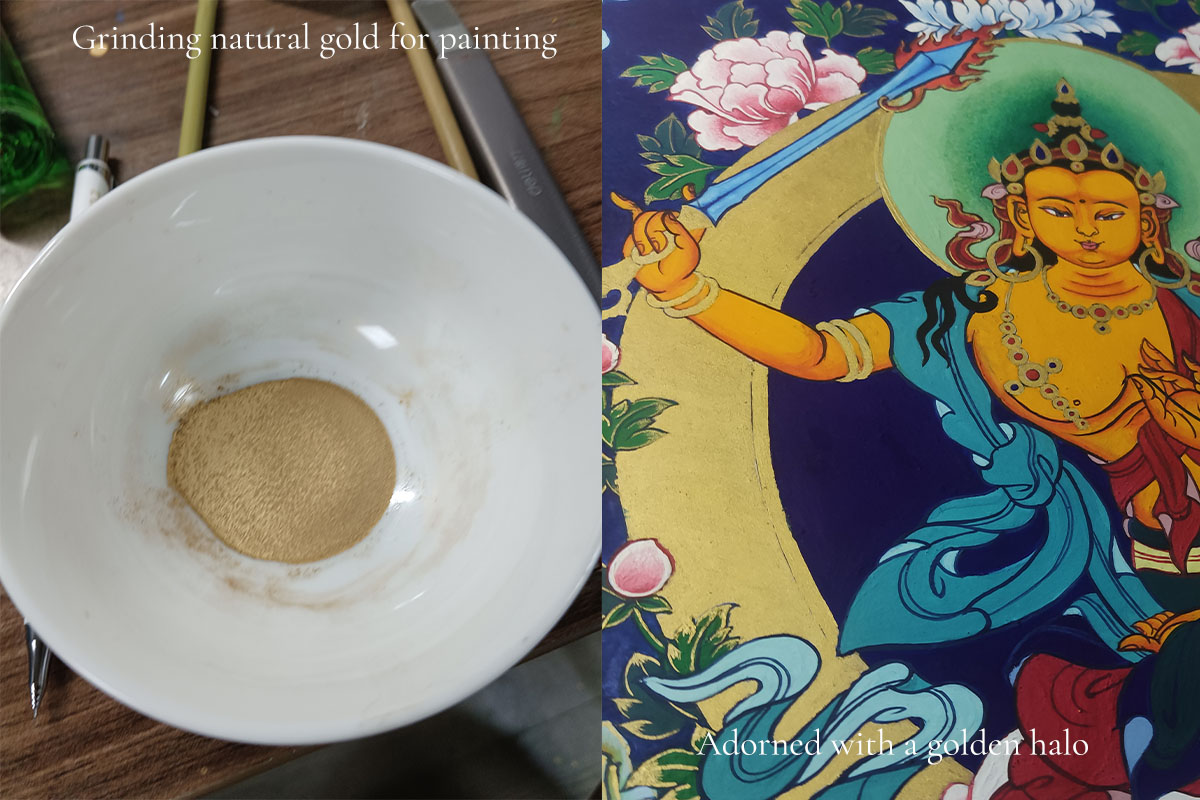
After the color has been applied, some of the original linework may be partially covered. I return to the painting and reinforce the contours, using colored or darker lines as appropriate to define the figures, clothing, flowers, rocks, and other details.
This second stage of outlining helps the image regain its clarity. The colors and shapes begin to work together more closely, and the relationships between the different parts of the composition become easier to read.
Gold is another important element in many traditional Thangka paintings.
Gold has long been valued for its rarity and beauty. In Tibetan Buddhist art, it has also been used to adorn revered images and emphasize important details. At major Tibetan Buddhist sites, such as Jokhang Temple in Lhasa, gilded religious images are part of a long tradition of craftsmanship and devotion.
Traditional Thangka painting can involve genuine gold, but preparing gold for painting is itself a demanding process. The gold must be worked into a form suitable for application, with careful preparation and repeated processing before it can be used. I still have some gold prepared for my own work, and I hope to demonstrate this process in a future article.
When I was learning gold detailing, my teacher had me practice with gold-colored acrylic paint before working with more precious materials. It was a sensible way to develop control and confidence without wasting real gold.
In my contemporary Thangka-inspired work, I sometimes use mica-based gold pigments associated with Chinese painting. They offer a different material and visual effect. When I paint a traditional Thangka, however, I continue to follow the material choices appropriate to that work, including the use of genuine gold where required by my practice.
The choice of material matters because gold is not simply a decorative finish. Its texture, reflectivity, and relationship with the surrounding colors all influence the final appearance.
Once the outlining and gold detailing are complete, the painting is close to finished.
Unlike some painting processes in which dried layers can be extensively reworked, traditional Chinese painting and Thangka painting can be difficult to correct once certain materials have been applied. Each stage therefore requires care and foresight.
Step 5: Looking Again — Learning from the Finished Painting
When the painting is nearly complete, I step back and look at the entire image again.
Is the visual center clear? Do the colors work together? Do the lines and decorative patterns form a coherent rhythm? Are the details balanced with the composition as a whole?
When you spend a long time working on one small area, it is easy to lose sight of how it relates to everything around it. Looking at the painting from a little distance can reveal problems that were difficult to notice up close.
What happens if I find something that is not quite right?
Sometimes an adjustment is still possible. At other times, the materials or the stage of the painting make a correction difficult. In those cases, I have to accept the result, remember what I have learned, and approach the problem differently in my next work.
That is one reason I continue to observe and reflect throughout the process, rather than waiting until the end to evaluate the painting.
I study Chinese traditional painting and calligraphy, and I continue to learn from Thangka art. Although these artistic traditions have their own histories and methods, I find meaningful connections in the way they approach line, structure, rhythm, and space.
They are not the same, but each can deepen my understanding of the other.
For me, painting is not about reaching the final stage as quickly as possible. Composition establishes the structure; drawing clarifies the forms; color builds relationships and layers; outlining and gold detailing bring the image into focus. Each stage has its own purpose, and each depends on careful observation and thought.
When these elements finally come together, the painting begins to feel complete.
Looking Beyond the Finished Image
The next time you look at a traditional Thangka, you might try looking beyond its brightest colors first.
Notice how the lines establish the figures. Look at how the decorative elements surround the central image, and how the colors, patterns, and gold details relate to one another.
Behind the finished painting are many decisions that may not be obvious at first glance: where to place a line, how to prepare a pigment, when to add a detail, and when to leave the composition as it is.
Understanding these steps does not require you to be a painter. It simply offers another way to appreciate the work.
What first appears to be a richly detailed image can then be seen as the result of a gradual process — one shaped by inherited knowledge, practical experience, patience, and the artist's own judgment.
For me, that is part of what makes Thangka painting so rewarding. The finished work matters, but so does the accumulated knowledge and attention that allow it to take shape.
Frequently Asked Questions
How is a traditional Thangka painted?
A traditional Thangka generally develops through several stages: planning the composition, drawing the figures according to established proportions, outlining the forms, applying color, refining the linework, and adding decorative details such as gold. The exact process varies with the subject, artistic lineage, materials, and individual painter.
Why are proportions important in Thangka painting?
Traditional Buddhist figures are often drawn according to established systems of measurement known as iconometry. These proportions help preserve the visual conventions of particular figures and traditions. Backgrounds and decorative elements may allow more room for the artist's interpretation.
What pigments are used in Thangka painting?
Traditional Thangka painters have used mineral pigments and other natural color materials. Contemporary artists may also work with other paints and mineral-color materials. The choice depends on the tradition being followed, the intended effect, and the individual artist's practice.
Why does Thangka painting take so much time?
The work involves more than applying color. Preparing the painting surface, establishing accurate proportions, drawing fine lines, preparing pigments, applying color evenly, refining details, and adding gold can all require considerable time and care.
Does every Thangka use real gold?
Not every Thangka uses the same materials. Genuine gold has an important place in traditional Thangka painting, while contemporary works may use other gold-colored materials. The materials should be understood in relation to the specific artwork and the artist's process.
Can traditional Thangka techniques inspire contemporary art?
Yes. Artists can learn from Thangka's use of line, color, proportion, ornament, and visual rhythm while developing contemporary compositions. It is important, however, to distinguish traditional Thangka painting from contemporary work inspired by its visual language.
This article reflects my own experience as an artist working across Chinese traditional painting, calligraphy, and Thangka. Specific materials and methods vary between artists and traditions.
Golden Ink Arts
Quiet Eastern Art for Modern Living.